I’ve Made a Video with AI. Here’s How You Can Do It Too
How to generate AI videos with a few prompts.
⏳ This Black Friday week only, I’m offering 50% off my annual Premium subscription.
As you may’ve noticed, lately, I’m publishing only articles for paid subscribers, so this is the best time to get a whole year of exclusive subscriber content at the lowest price price.
I’m making this article free for everyone so you can see what you’ll get with an annual subscription 😉
AI can generate articles, images, code, and now entire videos too!
I’ve just tested an AI tool that is able to generate videos ranging from 15 seconds to 15 minutes, all in a few clicks. With it, you can now generate videos for social media in no time.
I tested this tool to see how good it was and I was really amazed by the result. Before I share with you the name of this AI tool and how to use it, first take a look at the AI-generated video below. The video will remind you why you should pay more attention to your pets ;)
I think the video turned out very cool and the AI accurately understood my requests. The sweetest perks? It’s free and easy to use.
Let’s break it down.
Step #1: Log in
First of all, this AI tool is named InVideo. The first thing we have to do is sign in to our account (or register). This tool is very easy to use and has a simple layout. Right when you sign in, you’ll see a message box. This is where we give instructions to the AI.
Step #2: Set up parameters
First, I’ll use the menu at the top right to pick “YouTube Explainer” as the type of video I want to make.
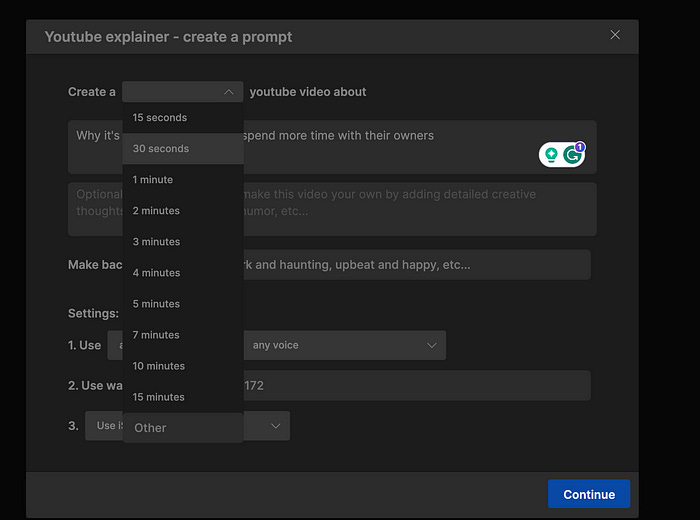
Then, I’ll choose how long the video should be. I want a 30-second video, but you can generate videos from 15 seconds up to 15 minutes.
Next, I’ll choose the kind of background music I want. I’ll go for normal music, but you can also pick sad or happy music if you like. Then, I’ll select the voice that will talk in the video. The tool has many realistic computer-made voices, which is really amazing. I want a voice that sounds like a clear-speaking American woman.
After that, I have the option to add text that shows who made the video. I’ll skip this part because I don’t need any text there.
Lastly, I can pick where the AI gets its video clips from. Since I don’t have a favorite source, I’ll let the tool choose the best source it can find.
Step #3: Writing the prompt
Now I’ll type my topic into the first message box. It will also ask for more information on what to include and what to leave out.
I want to talk about pets that feel lonely when their owners don’t spend time with them, but I’d like to do it with some humor.
So, in the first box, I’ll write:
Prompt: “Why it’s important for pets to spend more time with their owners.”
In the next box, where I can give more details, I’ll write:
Prompt: “Start by saying that pets like cats and dogs feel happy and loved when they play with their owners. But when the owner comes home tired and doesn’t play with them, they feel sad. If the owner goes out with friends and leaves them behind, they feel even worse. End by imagining the cat and dog packing their bags and leaving to find a new home.”
Step #4: Add more information
When you click “Continue,” InVideo will ask for some more information. It wants to know who you are making the video for and what kind of style or mood you want the video to have.
Now, after I do that and click on “Generate,” InVideo will make my first version of the video in just a short time. To generate a 30-second video, it took this tool about 1 minute.
Step #5: Final edition
After your video is made, you can watch it and make any changes if you want. You can ask for new video clips or edit the current one by giving a command like “Show a garden scene from a drone.”
If you click “Edit,” you’ll see more choices for making your video better. You can also change the words in the video or add your own picture. If you want to change something in the video, you can also look for new pictures in the stock options.
Now that you’ve made all the changes and watched the video one more time, you can download it.
Remember that the free version of this tool has some limitations, so if you want to generate more videos, here’s a plan comparison.
Free version — you can generate up to 10 minutes of videos and export up to 4 videos per week. You have limited storage till 10 GB.
Plus 20$ — you can generate up to 50 minutes of videos per week and unlimited exports. Have bigger storage up to 100GB.
Max 48$ — you can generate up to 200 minutes of videos per week and unlimited exports. It has much bigger storage up to 400GB.
Let me know what you think about this tool in the comment section.


This is really cool. I believe I can give this a try based on your explanation. Your step by step guide made it seamless. Thanks for sharing!